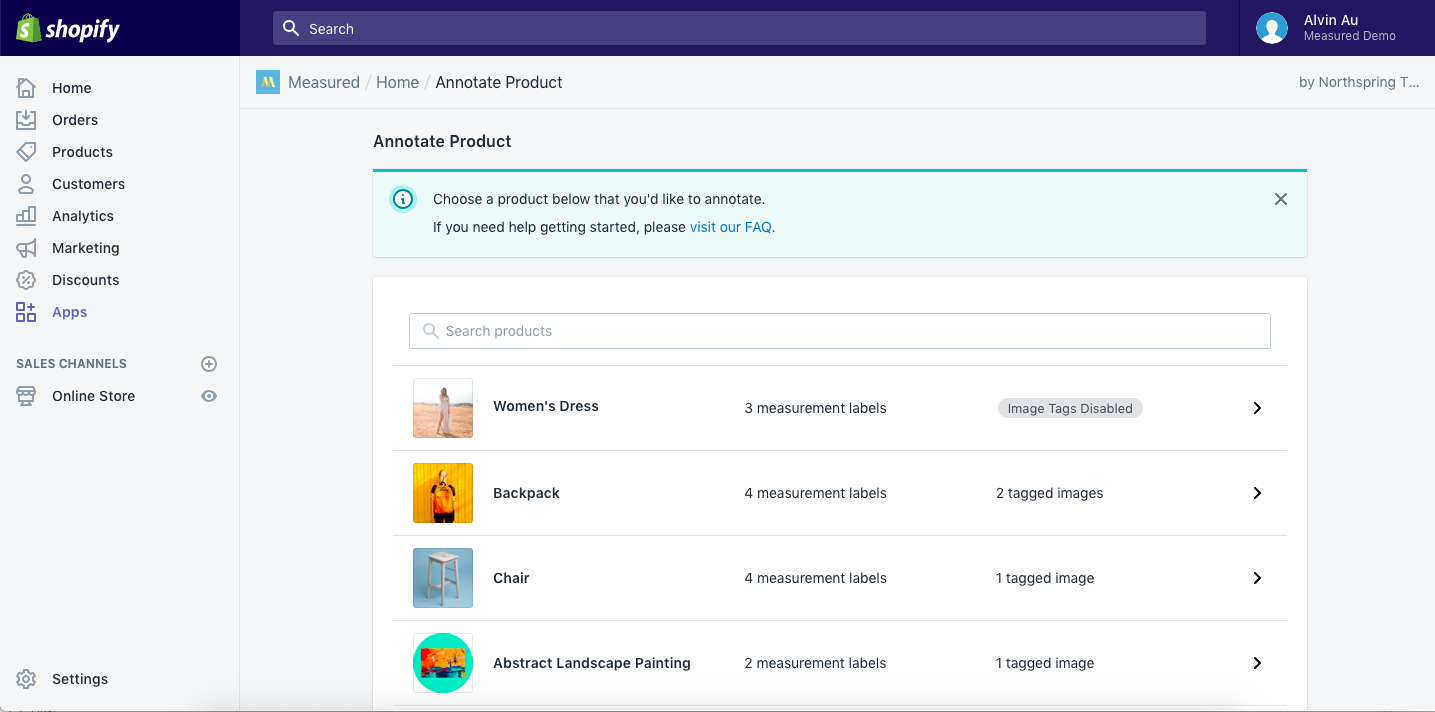
Click on the ‘Annotate new product’ button on your home page.
Select a product to annotate. This will bring you to the ‘Edit Product’ page.
You can also filter the products in this page using the search tool.
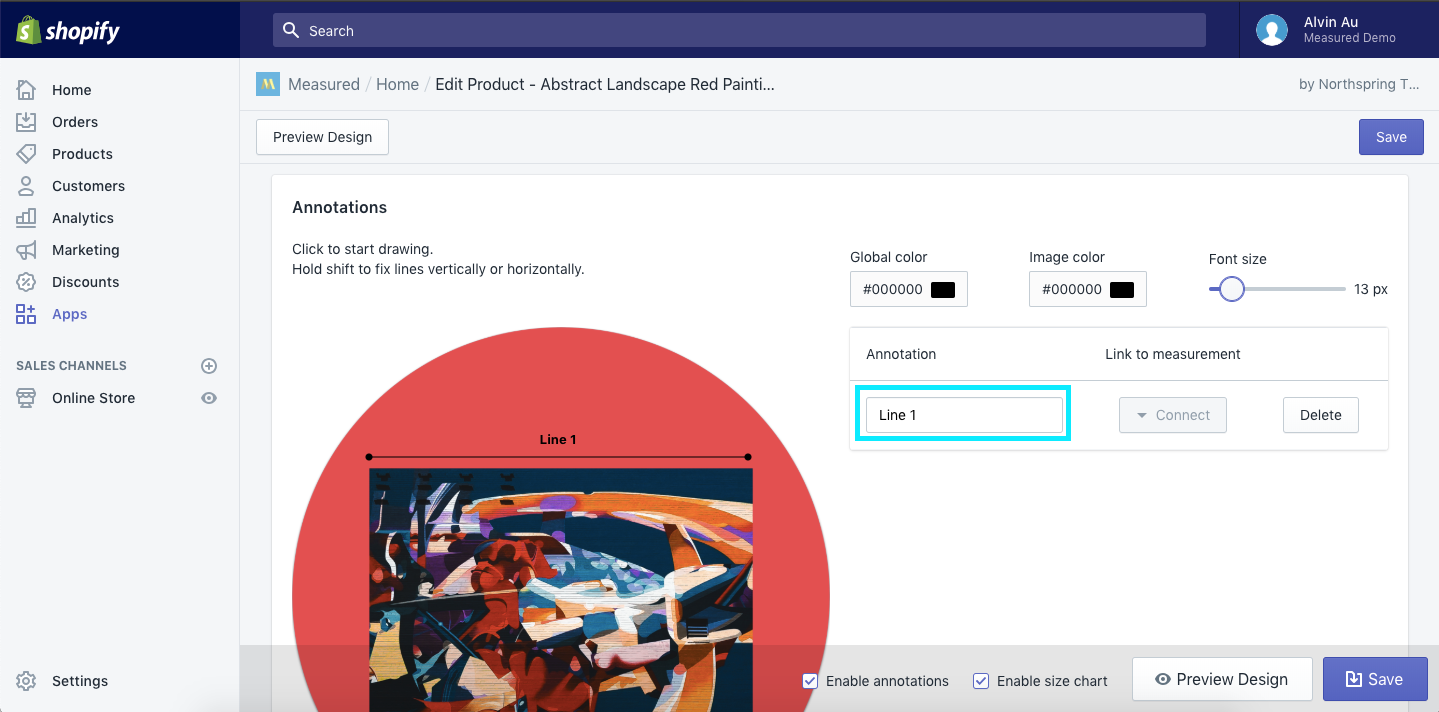
Draw a line
Click once on your product image to set the start point. Click again anywhere else on the image to set the end point.
You can adjust the start and/or end points by clicking on either of them and dragging them.
You can also adjust the position of the line - first hover over the line until it is highlighted. Then simply drag it to your desired position on the image.
Name the measurement
The line(s) you have drawn will be named Line “X” (Line 1, Line 2,... etc) by default.
To rename them, simply type in your desired name for the line on the associated box to the right of your product images.
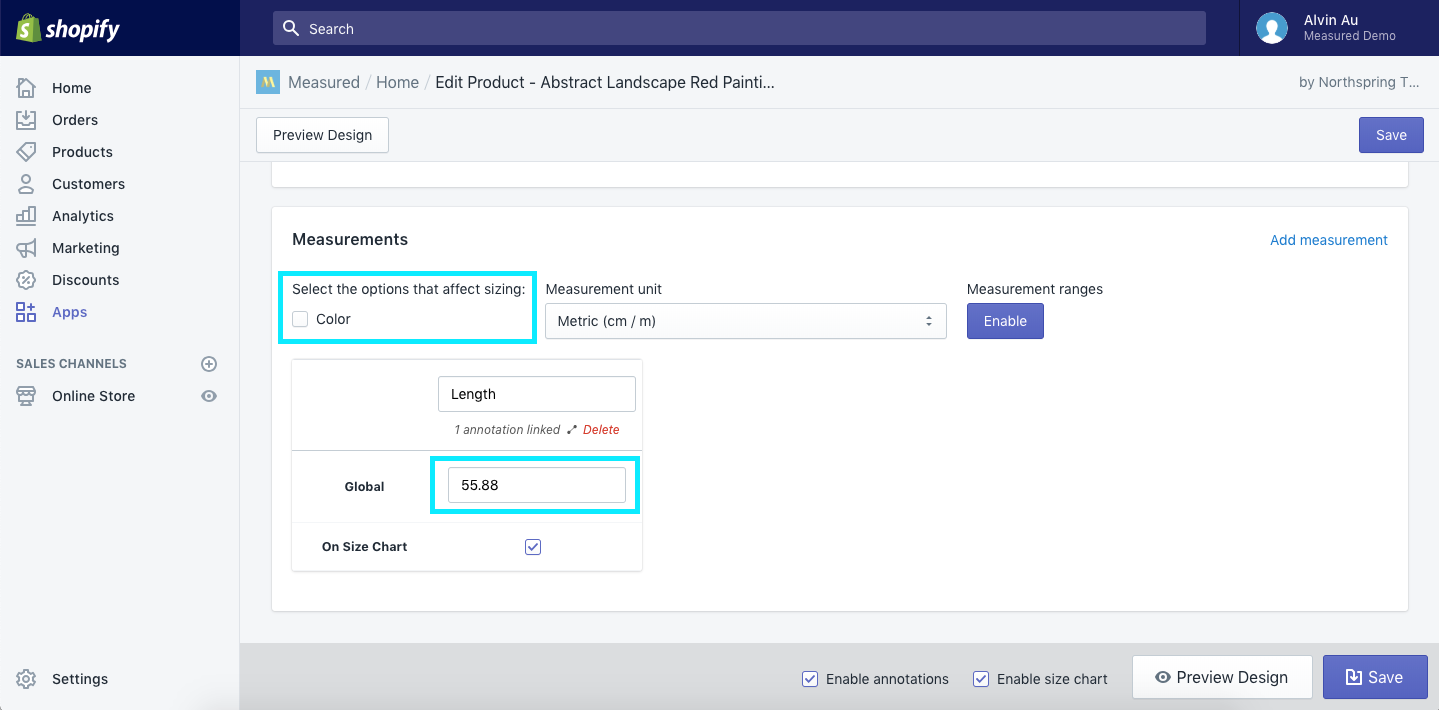
Label the measurement
The actual values for each measurement are set in the section below your product images.
Uncheck any options, such as ‘Color’, that do not affect sizing.
If your measurement does not change across variants, enter it on the Global row.
Otherwise, enter the length of the measurement for each product variant, one per row.
You can preview your product by clicking on the ‘Preview Design’ button at the bottom of your screen. Click
here to learn more.
Remember to save your changes before you leave the page!
NOTE : In the case that
more than one option affects sizing, the ‘top-level' option dropdown controls which option will be displayed on your size chart by default. See here for more on 'top-level' options.
The other options will be available for selection for your customers through a drop down menu.